Welcome to Influencer.co. This tutorial and video will teach you how to Apply to Join as an Influencer.
Tutorial Topics:
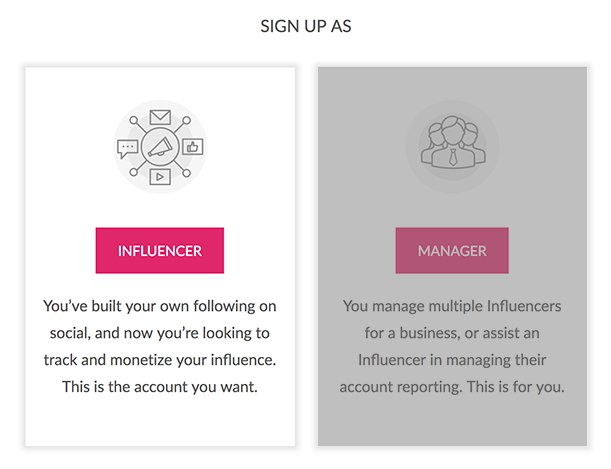
1) Apply to Join Now as an Influencer2) Verify your social media accounts3) Help us understand your audience4) Invite a Manager5) Invite other Influencers and FriendsWatch the General System Overview screencast to find out more about Applying to Join as an Influencer.1) Click the Apply to Join Now button on the Home Page (or anywhere else it appears) 2) Click Influencer if you’re the one with the social following. If you have a Manager or Assistant, or you ARE a Manager or Assistant to an Influencer, refer instead to Apply to Join as a Manager and the Manager Tutorial.
3) Complete Step 1 of the Account Registration Process, as shown in the example below (only with your info!), reading and agreeing to the Terms of Service. If you have received an e-mail from a Manager asking you to join, it’s possible they will have pre-filled some of this information for you, but make sure to check it!4) On Step 2, start by Verifying your social accounts. For instance, if you fill in the rest of the page, then click Verify Facebook, you’ll open up the Facebook site and wipe any info you’ve loaded into Step 2!5) You’ll be taken to the Facebook site where you’ll sign in, if you aren’t already.6) Facebook’s Approval Modal pops up. Click Continue As … to allow us to authorize you, and lets us know you are who you say you are!7) Finish completing Step 2 with each of the social networks you use to reach your audience. You previously authorized Profile Name should now have a green checkbox by it, meaning you’ve done the previous step correctly. Then, click Next to move on to Step 3.8) As before, fill out Step 3 to let us better understand your audience. Click Submit My Application Now when you’re done.9) Once that’s done, all that’s left is to Invite Your Manager (if you have one) and Invite Friends(assuming you want to “share the love”), and then wait for us to review your finished application. These final steps are optional but encouraged! You’ll see them stacked in the image below but you can do one or both separately and at any time:Don't forget to invite other influencers!(Optional For Those With Managers, Agents, or an Assistant that you want to access your account – please note you can only have one!) Fill out the Invite Your Manager to Join section of the confirmation/success page, and click Send Invite Now.Once you hit Send, the form will clear and you’ll see the green success box. They will receive an e-mail to allow them to easily connect to you. You may want to take the opportunity to get in touch with them just to let them know the email is coming at your request! You can now move on to invite any Influencer friends you have to the platform.(Optional For Those With Friends You Want to Invite to Influencer.co) Fill out the Invite Other Influencers to Join section of the confirmation/success page, and click Send Invite Now.Now, look for that email confirmation that you’ve been approved and start using the Search feature to find the products you really care about promoting!Finished: Part I – Sign Up as an InfluencerOn to: Part II – Sign Up as a Manager
I - Your Manager’s Account (and What Everything Does)
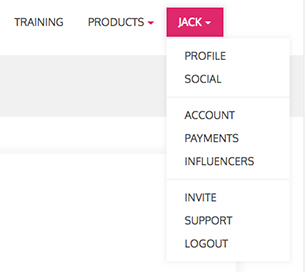
1) You’ll start by logging in as yourself athttps://influencer.co/login. Presumably, you’ve already done that.2) Once you’ve logged in, you’ll find yourself on your Influencers page. Here you’ll find all of the Influencers currently attached to you under My Influencers, as well as those you’ve already invited but who have not yet been accepted. While they are in Account Pending status, you’ll have limited ability to manage their account. Once they’ve submitted the rest of their information, verified their account, and approved you as their Manager, you’ll have enhanced privileges, though what you’re able to do will depend on the level of permissions they’ve granted you over their account.Note: You can also get back to your Influencers page by clicking on the Manager’s name (your name), in the upper right-hand corner of the site navigation, as you’ll see in the next step.3) Dropping down the Manager’s Name (your name) drop-down allows you to Manage your own account, so let’s briefly talk about that:
Profile - your personal information you registered with
Social - your (or your company’s) web site URL and social accounts
Account - verification, tax/W9 info (if necessary), payment info (us to you), and password reset
Payments - existing payments that have been made to you due to your Influencers’ efforts
Influencers - current Influencer status and log-in screen (more on that in a minute)
Invite - for adding more Influencers to your team
Support - a simple contact form if you run into problems with your account, or have a suggestion
Logout - it, uh… logs you out!
By and large, these are pretty self-explanatory, but let’s go back to the Influencers’ page because that changes things a bit.
II - Managing Your Influencers’ Accounts
1) Log into Your Account or use your Manager’s Drop-down to get to your Influencer’s Page where you see your list of Active and Pending Influencers.2) Clicking the blue Log In As button to the right of an Influencer’s name will log you into their account. Log In As will change to green and read Logged In and you’ll see a notification above that indicates that, “you are currently logged in as...”What’s particularly important is that you now have an additional drop-down in the upper right-hand corner of the page, which is that Influencer’s Name.3) Dropping down the Influencer’s Name drop-down allows you to Manage their account. We’ll go over that in more detail, but here’s the short version:
Reporting - used for seeing their Product Links and Performance
Payments - existing payments that have been made to them
Profile - their personal information they registered with
Social - their website URL and social accounts
Influence - their purported audience and monetization info
Logout - this time, this logs you out of their account, but not your own.
4a) Reporting takes you to that Influencer’s Performance Report, showing their Product Link activity.4b) Clicking on each link takes you to that particular Product’s Details Page. You’ll notice that as a Manager you can even leave Product- and Influencer-specific Notes at the bottom:4c) As you create Links for more and more items, you may want to Filter to see things differently, whether it’s your most recent links, or which Products generated how much revenue over a certain period of time for you.4d) Under the Filters header, you can click the Date Range to set start and end dates:4d) ...or click the Columns dropdown to change the information that’s displayed:1b) You’ll be taken to the Search Page.2a) From there, you can click the All Categories dropdown to the right of the pink Search button to Browse by Category.2b) ...or type a product into the Search field for a General Search.2c) ...or click Advanced Search for more options, including Country, Merchant, Brand, and Cost.3a) Clicking on any Product brings up its Create Product Link Modal.3b) Clicking on the Generate Link button will create a Custom Short Tracking Link for this Product that is specific to YOUR account, and automatically save it for you. You can get to it later by going to PRODUCTS > Links in the Top Navigation…3c) ...or click the Copy to Clipboard link now before you even close the Modal if you’re ready to use it now. The following popup will appear, letting you know it’s ready for Pasting (Command-V on a Mac, Control-V on a PC) into your next social post:3d) You can also click Copy Image URL to grab the graphic for posting.4a) As stated earlier, you can get back to your links anytime (even if you’ve logged out and back in) by going to PRODUCTS > YOUR LINKS & REPORTS in the Top Navigation…That’s all there is to it! As we add new features, we will revise these tutorials to make it as easy as possible for you to take advantage of your social influence. Thank you for being a part of Influencer.co.Finished: Part III – Managing Your Influencers and Their LinksOn to: Part IV – Linking and Reporting
This tutorial and video teach you how to search our database for products to promote. Follow these simple steps and you'll be on your way to monetizing as an Influencer in no time!
Tutorial Topics
1) Search for Products to Promote2) Creating Product Link Modals3) Monetizing Product Links4) Watch the Product Search and Monetize Link ScreencastStart by thinking about the products you feel strongly about, ones that you’ve either used or have a genuine interest in, that fit your Influencer persona and you feel will spark your Followers’ interest. Your searches can be really specific or start more broadly to find new things you like. Not every product you use will be in the database, of course, because not every company utilizes Influencer Marketing or approaches it the same way, but with more than half a million products in the database, you’re bound to find things that resonate with you!
Searching Our Database for Products to Promote
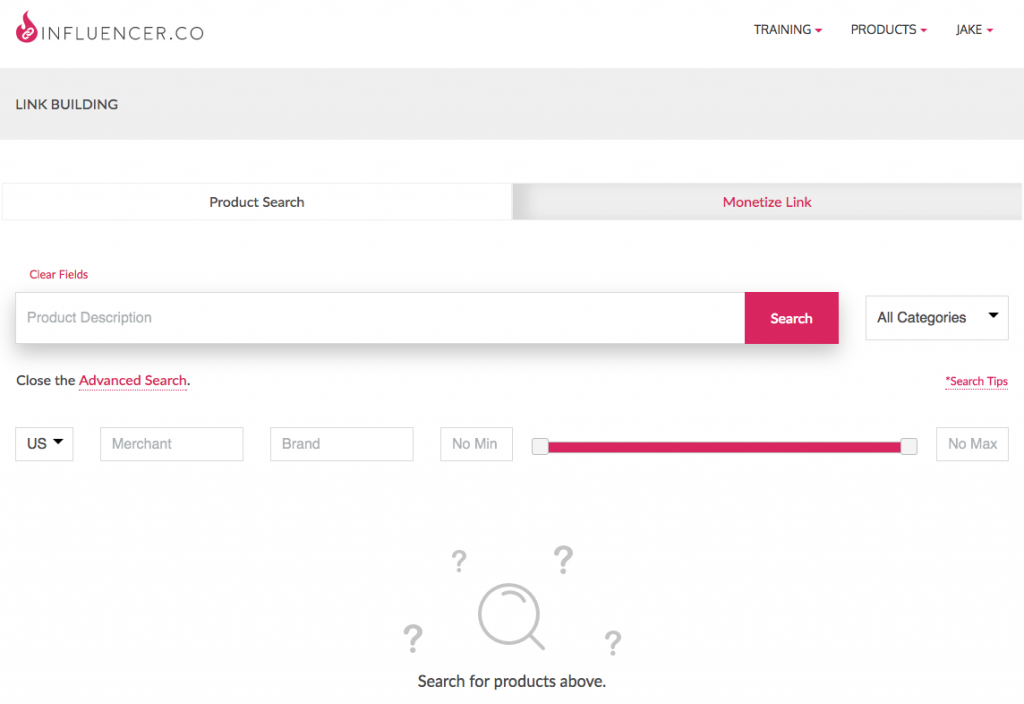
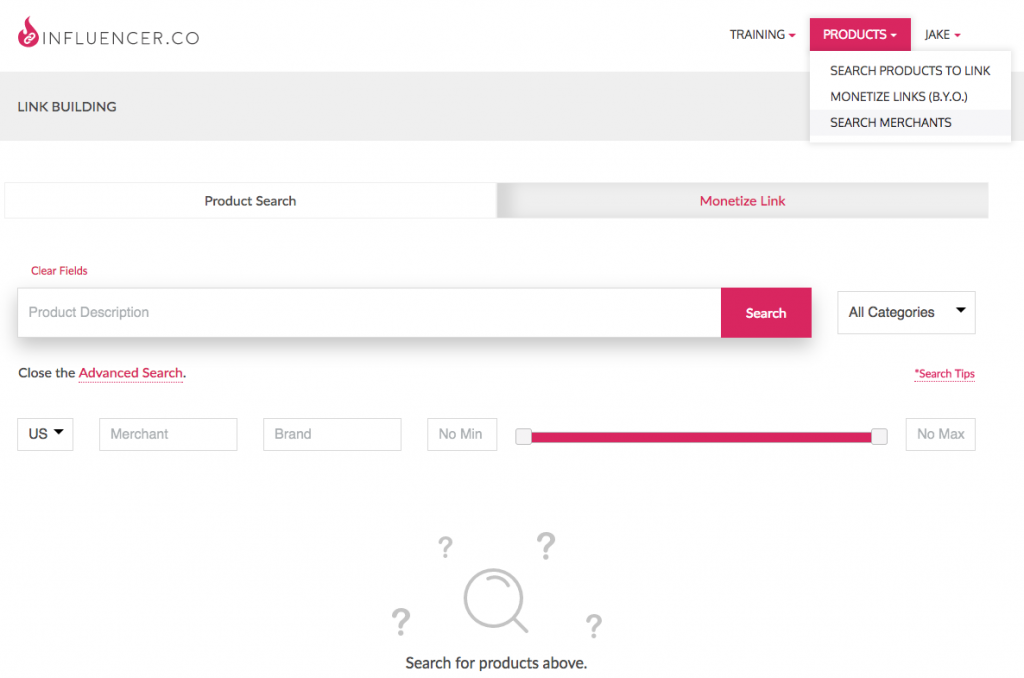
1a) To start searching for Products, Log In to the account you’ve previously created, then click the PRODUCTS dropdown in the top navigation.1b) Then click SEARCH PRODUCTS TO LINK and you’ll be taken to the Product Search Page.2a) From there, you can click the All Categories dropdown to the right of the magenta Search button to Browse by Category.2b) ... or type a product into the Search field for a General Search.2c) ... or use Advanced Search for more options, including Country, Merchant, Brand, and Cost.3a) Clicking on any Product brings up its Create Product Link Modal.3b) Clicking on the Generate Link button will create a Custom Short Tracking Link for this Product that is specific to YOUR account, and automatically save it for you. You can get to it later by going to PRODUCTS > YOUR LINKS & REPORTS in the Top Navigation…3c) ... or click the Copy to Clipboard link now before you even close the Modal if you’re ready to use it now. The following popup will appear, letting you know it’s ready for Pasting (Command-V on a Mac, Control-V on a PC) into your next social post:3d) You can also click Copy Image URL to grab the graphic for posting.
Monetize (Most) Product Links [Bring Your Own]
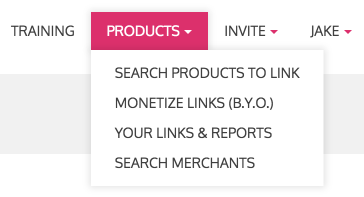
4a) You can search our product database for other products you’ve found. First, Log In and click Products in the header, then click Monetize Links (B.Y.O.) in the dropdown:
4b) You’ll be taken to the Product URL Search Feature, where you can input the URL for the page where you found the product:
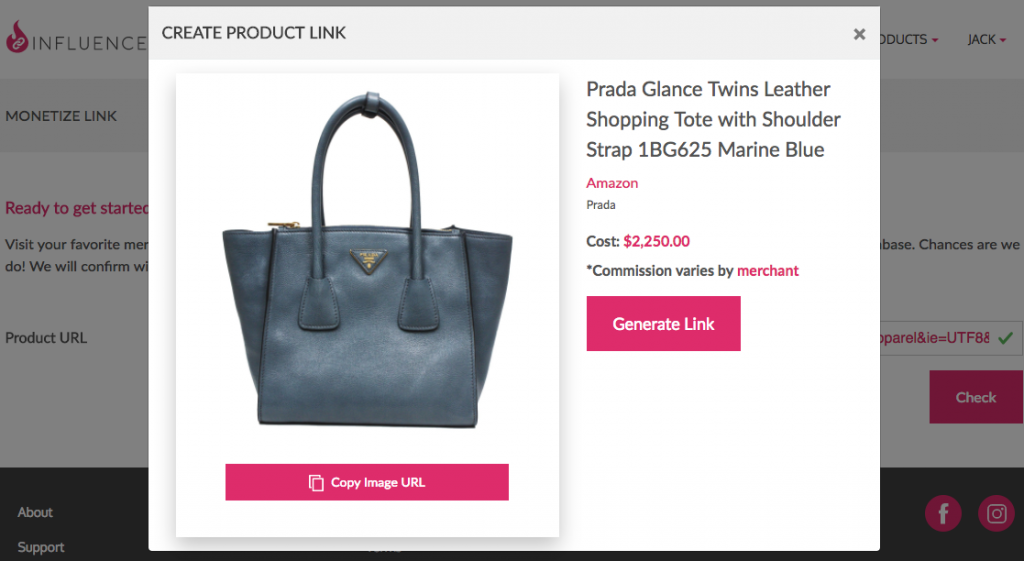
4c) We’ll search our database and tell you if we carry that specific product. If we do have the product, you’ll get a result like this:
If we don’t have it in our product database, you’ll get a notification like this:Don’t worry if you get a Link Not Monetizable notification, we’ve got thousands and thousands of other products to choose from, so you’re sure to find something that just right for you and your followers.
4d) From here, you can click on Generate Link to create a link for sharing with your followers (**If you’re logged in as a Manager, you need to log yourself into the Influencer account you will be sharing the product on):
4e) From here, you can copy the link to your clipboard (as shown in step 3d), or copy it directly for use on your social channels. You can also copy the image to share. It’s that easy!
Watch the Product Search and Monetize Link screencast for more detailed information.Finished: Part IV – Linking and ReportingOn to: Part V – Creating and Viewing Reports
This tutorial and video will teach you how to create and view your Link Performance Reports.
Tutorial Topics
1) Accessing Performance Reports2) Video Screencast: Link Performance Reports1a) You can view your links anytime (even if you’ve logged out and back in) by going to PRODUCTS > YOUR LINKS & REPORTS in the Top Navigation…1b) Which will take you to your Performance Report, showing each of your Links.1c) As you create Links for more and more items, you may want to Filter to see things differently, whether it’s your most recent links, or which Products generated how much revenue over a certain period for you.1d) Under the Filters header, you can click the Date Range to set start and end dates:1e) ... or click the Columns dropdown to change the information that’s displayed:Watch this informative Link Performance Report screencast for more information on Link Reporting.
It's that easy to create and view reports! Go ahead and give it a try for yourself and you'll see how simple it is to track and report your Influencer.co earnings.
Finished: Part V – Creating and Viewing ReportsOn to: Part VI – Advanced Merchant Search
This tutorial and supplementary screencast will teach you more about Incluencer.co's Merchant Search features.
Understanding how our Merchant Search feature works will help you make the most of your reach as an Influencer or Manager. With our Merchant Search, you can explore the thousands of products we offer, as well as create custom searches to find those just-right products your audiences want most.
I - Searching for Products by Merchant
1) Start by logging in as yourself athttps://influencer.co/login.1a) Once you're logged in, you'll be taken to the Products page, where you can access the Merchant Search feature. You can click on a Product to pull up the Product Info Screen, where you can click on the Merchant's name or access it through Monetize Link tool.
1b) You can also find it under the main navigation menu under the Products dropdown.
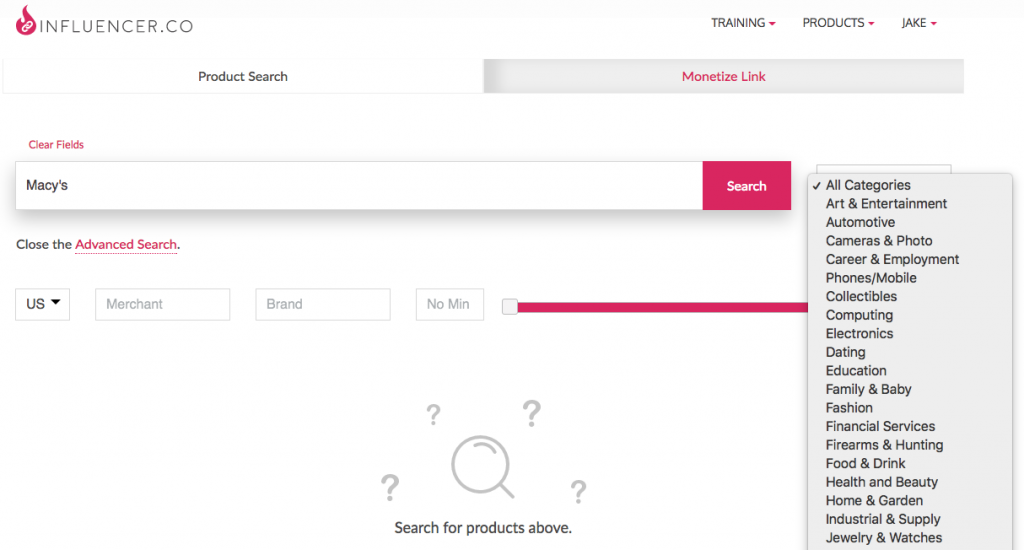
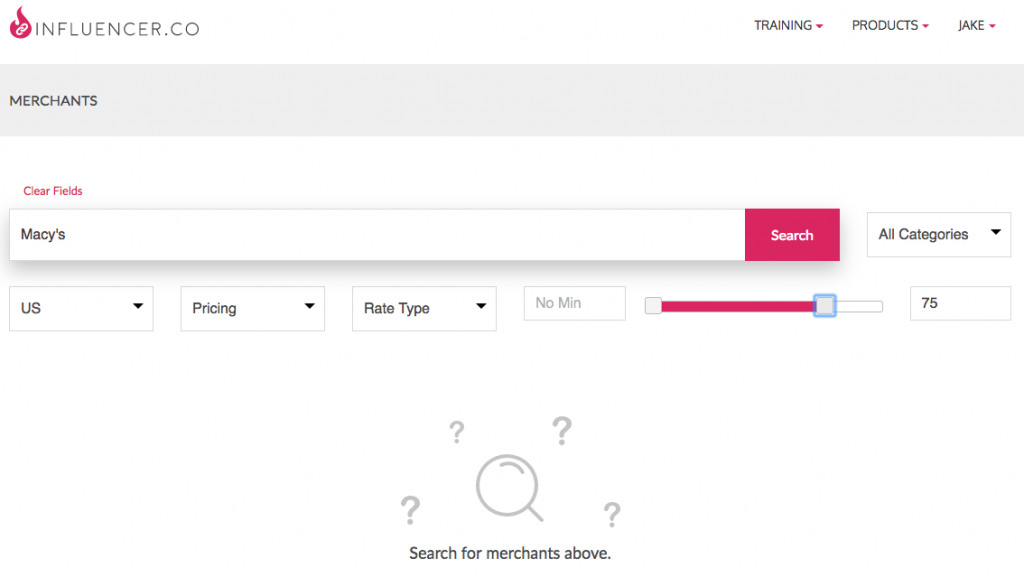
1c) Now that you've accessed the Merchant Search feature, you can use the Search Box or the Categories menu to find your preferred Merchants. This is the simplest way to use the Merchant Search tool.
II - Customizing Your Search
Influencer.co lets you customize your Merchant Search with a number of tools designed to optimize your reach and monetary return.
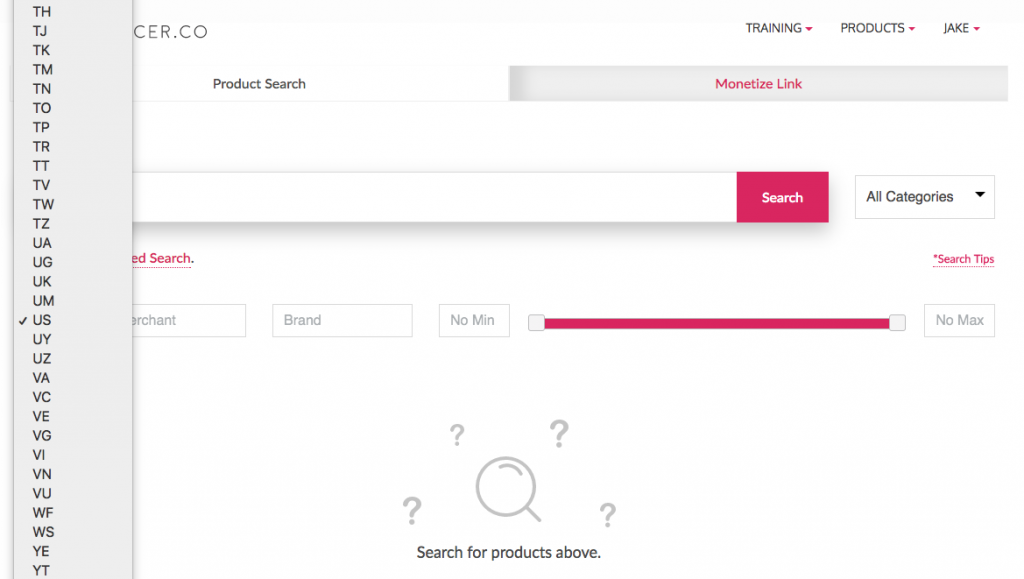
2) You can Search by Country, meaning where the Merchant can operate.
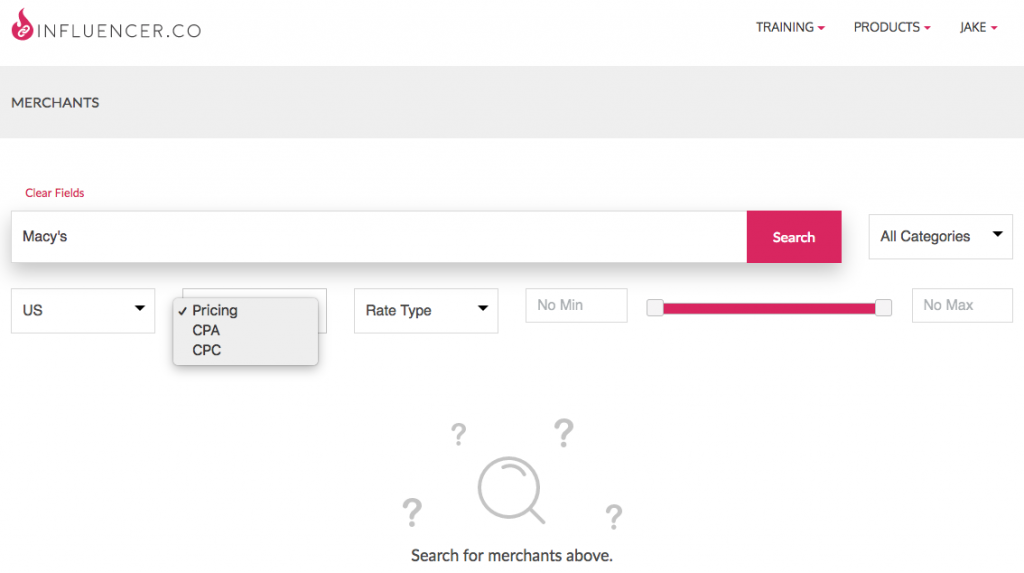
2a) You can also Search by CPA vs. CPC. CPA (Commission Per Acquisition) means the Commission is paid when the Product is purchased. CPC (Commission Per Click) means the Commission is paid when people click your link and navigate to the Merchant's page. Not all Merhcnat's support both CPA and CPC, so always confirm prior to creating and sharing any links.
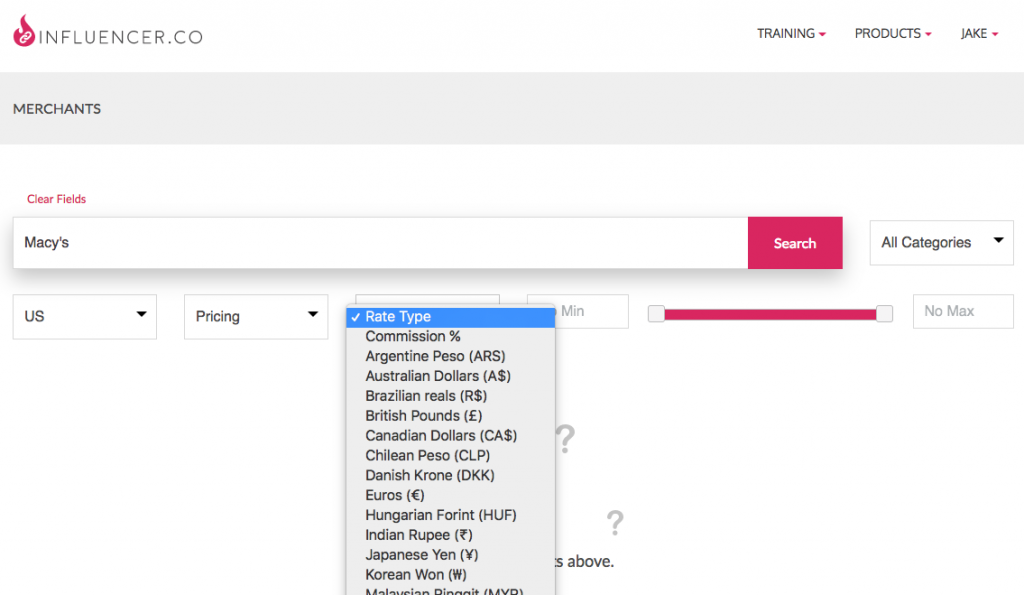
2b) You can filter your Search based on the Rate Type as well. This will confirm you're being paid accurately and according to your currency preferences.
2c) Use the Commission Type Slider Feature to set the Minimum or Maximum amount of Commission offered.
III - Understanding Your Search Results
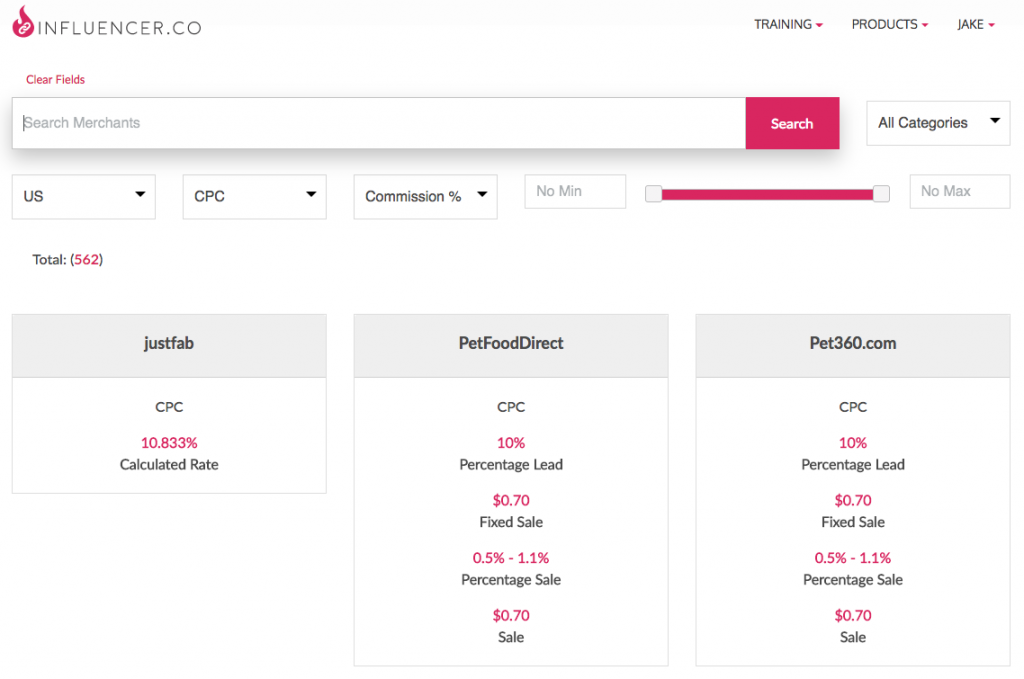
3) Once you've put in your search parameters, click Search and your results will populate below. The Merchant name will appear at the top of every Product result. If available, you can also see the Merchants pricing type (CPA/CPC) and rate options. If the Merchant name is underlined, you can click the name and go directly to that Product from that Merchant, where you'll be able to create a Link for sharing.
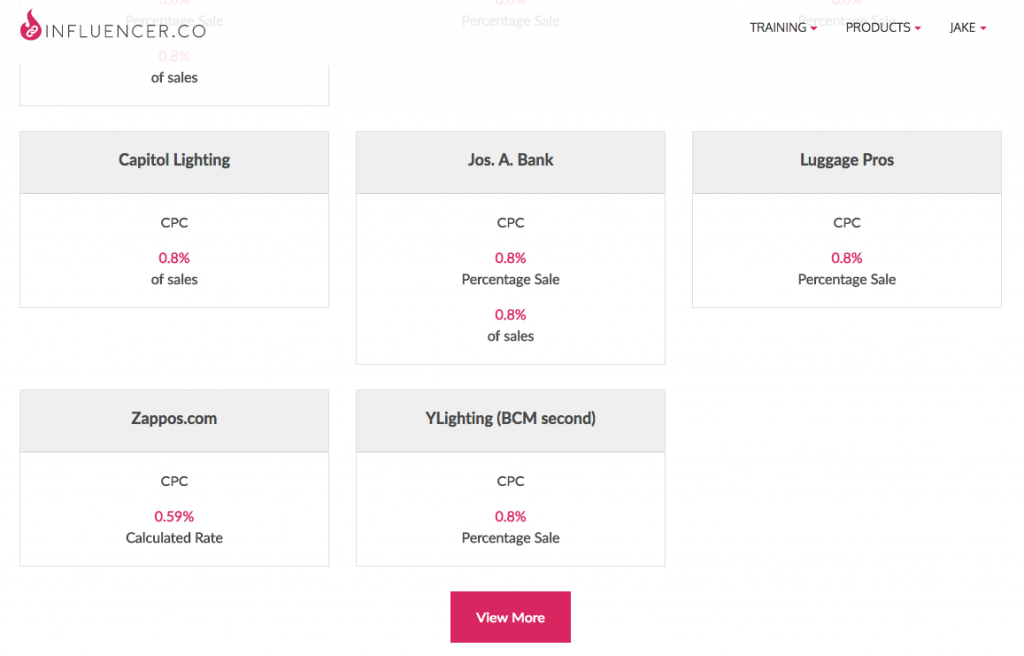
3a) If you don't see the product you're looking for, you can click the View More button at the bottom of your Search results to load more Products.
That's it! Using the Merchant Search tool makes finding the best Products simple.
Watch the Merchant Search screencast for more detailed information on searching by Merchant and other categories.
This is the last in the series of Tutorials. We will continually update these Tutorials as we introduce new features. You can access them at any time by clicking on Tutorials in the Training section of the main menu. Or you can click here to go to the Tutorials main page.
Thank you for using Influencer.co.

 2) Click Influencer if you’re the one with the social following. If you have a Manager or Assistant, or you ARE a Manager or Assistant to an Influencer, refer instead to Apply to Join as a Manager and the Manager Tutorial.
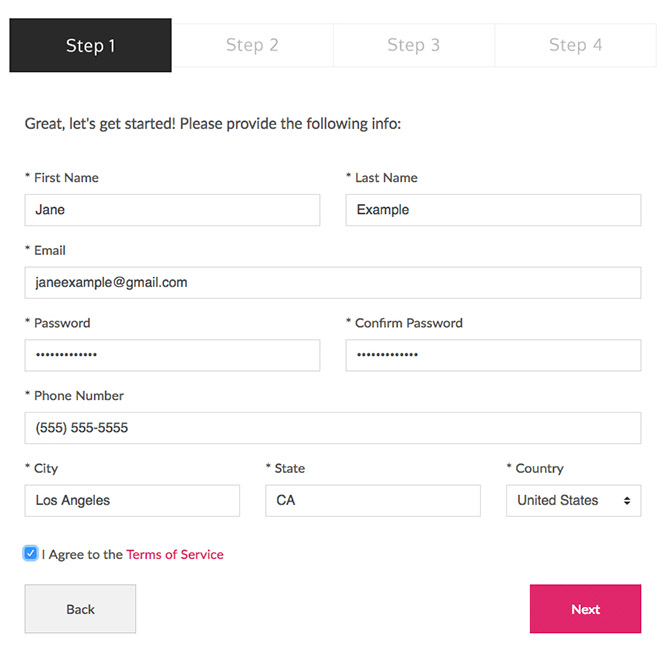
 3) Complete Step 1 of the Account Registration Process, as shown in the example below (only with your info!), reading and agreeing to the Terms of Service. If you have received an e-mail from a Manager asking you to join, it’s possible they will have pre-filled some of this information for you, but make sure to check it!
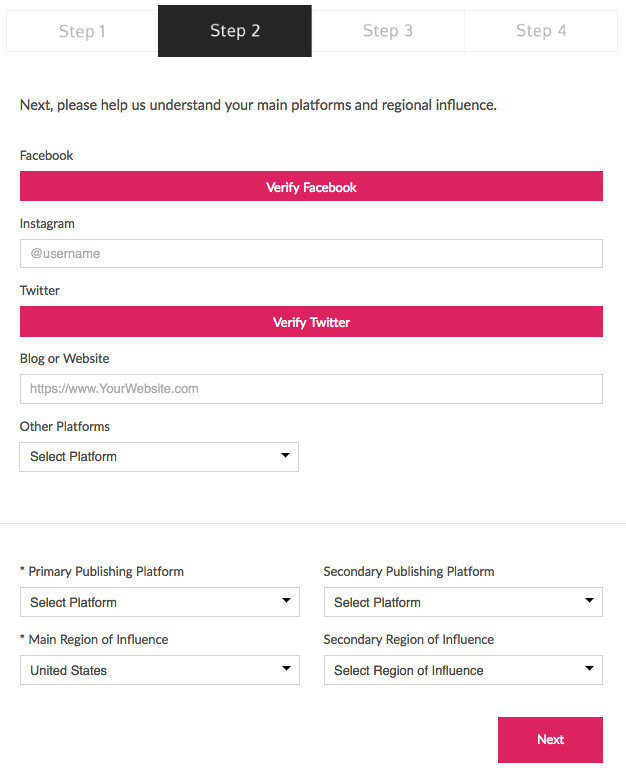
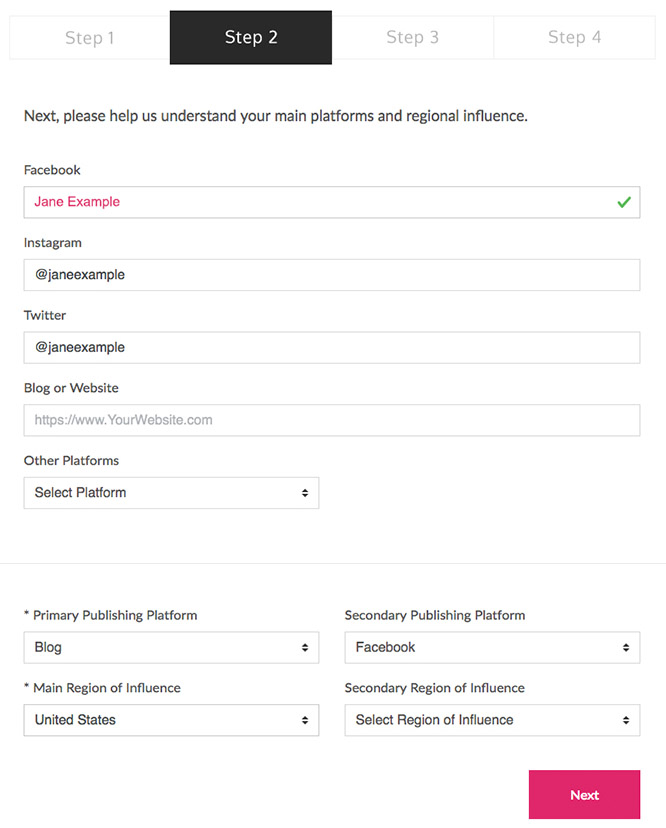
 4) On Step 2, start by Verifying your social accounts. For instance, if you fill in the rest of the page, then click Verify Facebook, you’ll open up the Facebook site and wipe any info you’ve loaded into Step 2!
 5) You’ll be taken to the Facebook site where you’ll sign in, if you aren’t already.
 6) Facebook’s Approval Modal pops up. Click Continue As … to allow us to authorize you, and lets us know you are who you say you are!
 7) Finish completing Step 2 with each of the social networks you use to reach your audience. You previously authorized Profile Name should now have a green checkbox by it, meaning you’ve done the previous step correctly. Then, click Next to move on to Step 3.
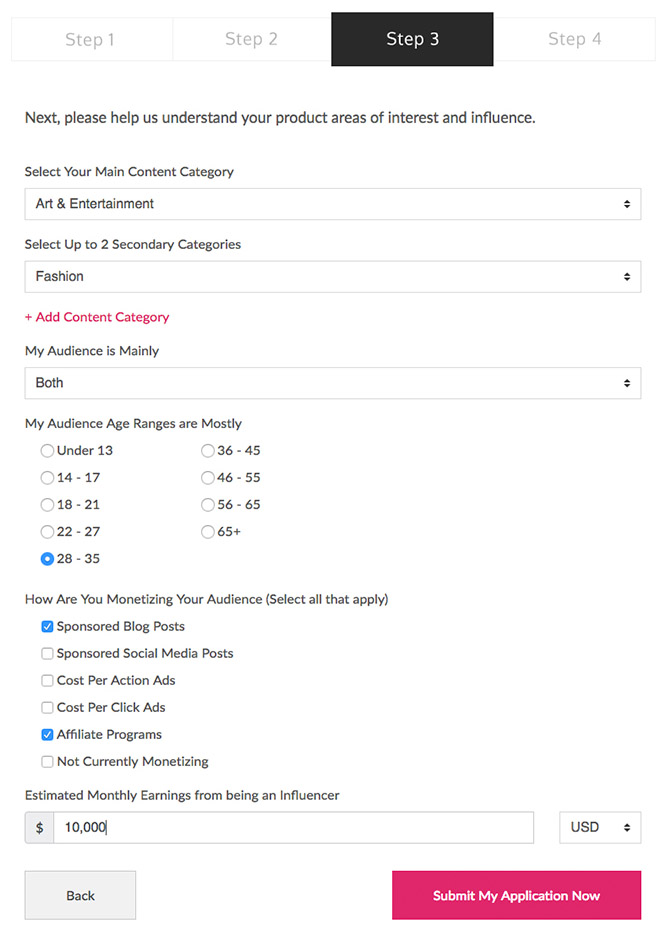
 8) As before, fill out Step 3 to let us better understand your audience. Click Submit My Application Now when you’re done.
 9) Once that’s done, all that’s left is to Invite Your Manager (if you have one) and Invite Friends (assuming you want to “share the love”), and then wait for us to review your finished application. These final steps are optional but encouraged! You’ll see them stacked in the image below but you can do one or both separately and at any time:
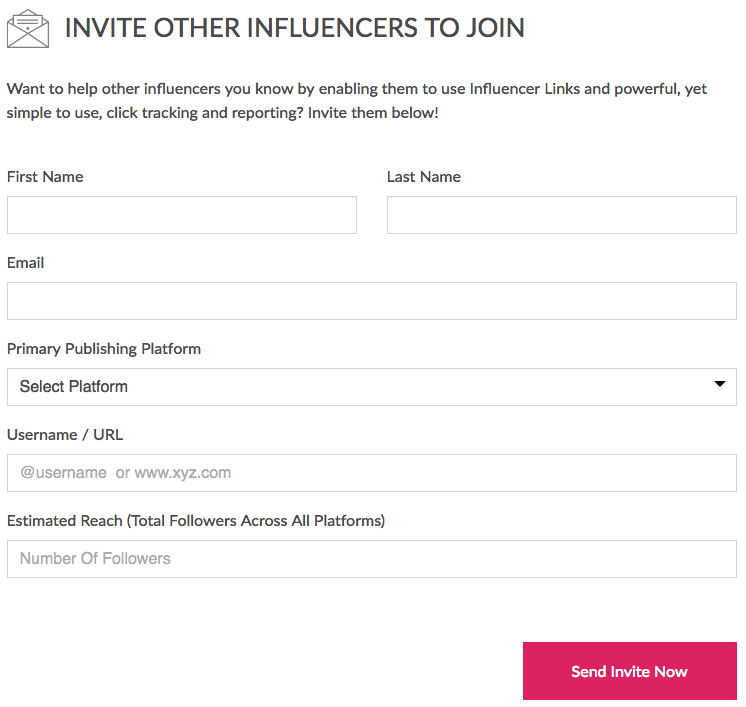
 Don't forget to invite other influencers!
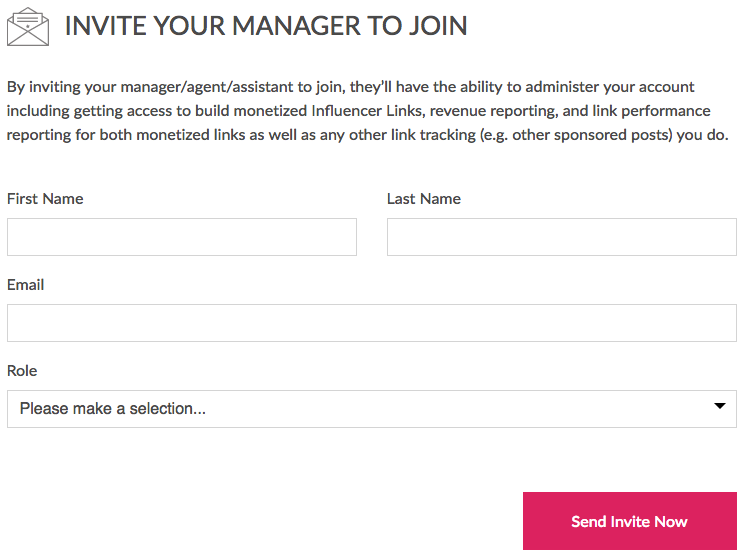
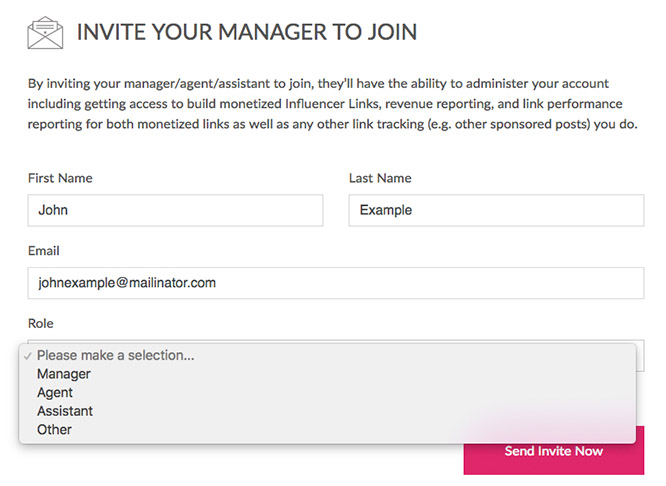
 (Optional For Those With Managers, Agents, or an Assistant that you want to access your account – please note you can only have one!) Fill out the Invite Your Manager to Join section of the confirmation/success page, and click Send Invite Now.
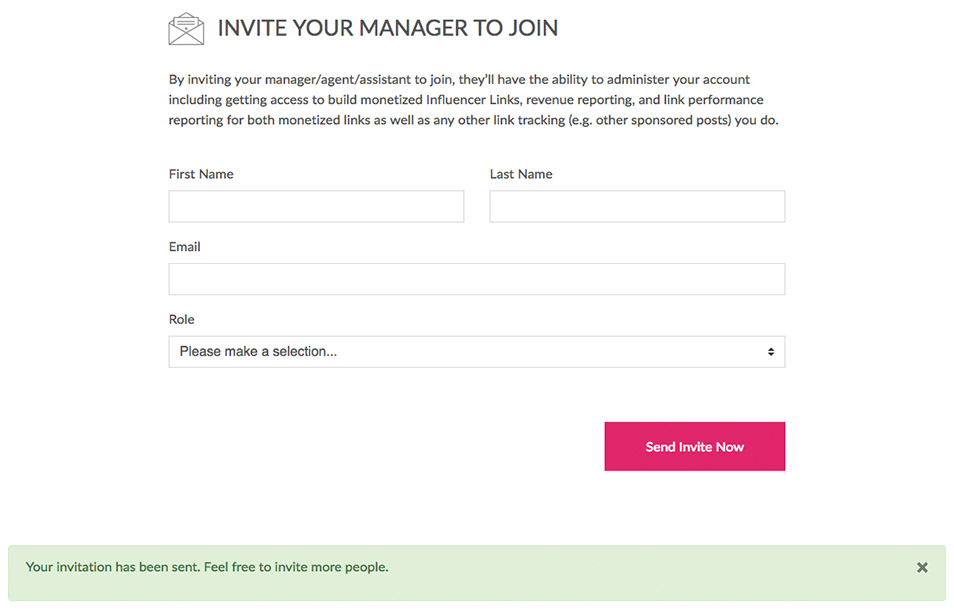
 Once you hit Send, the form will clear and you’ll see the green success box. They will receive an e-mail to allow them to easily connect to you. You may want to take the opportunity to get in touch with them just to let them know the email is coming at your request! You can now move on to invite any Influencer friends you have to the platform.
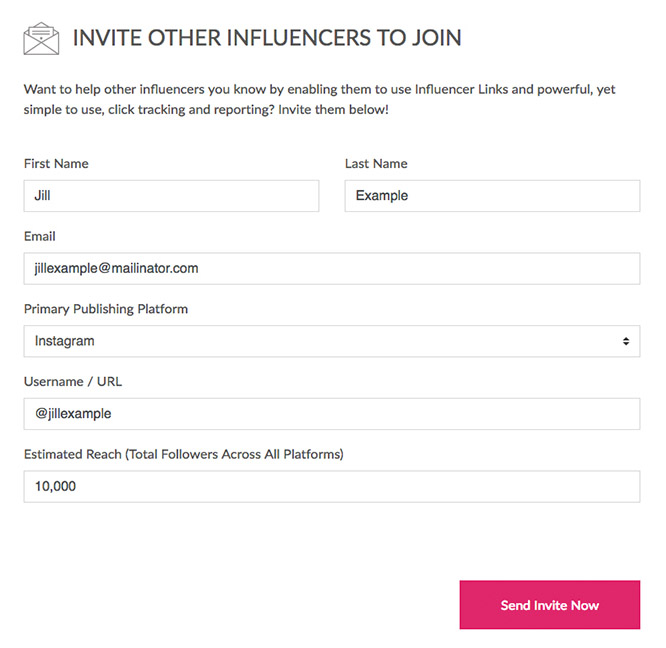
 (Optional For Those With Friends You Want to Invite to Influencer.co) Fill out the Invite Other Influencers to Join section of the confirmation/success page, and click Send Invite Now.
 Now, look for that email confirmation that you’ve been approved and start using the Search feature to find the products you really care about promoting!
Finished: Part I – Sign Up as an Influencer
On to: Part II – Sign Up as a Manager
Now, look for that email confirmation that you’ve been approved and start using the Search feature to find the products you really care about promoting!
Finished: Part I – Sign Up as an Influencer
On to: Part II – Sign Up as a Manager

 2) Once you’ve logged in, you’ll find yourself on your Influencers page.
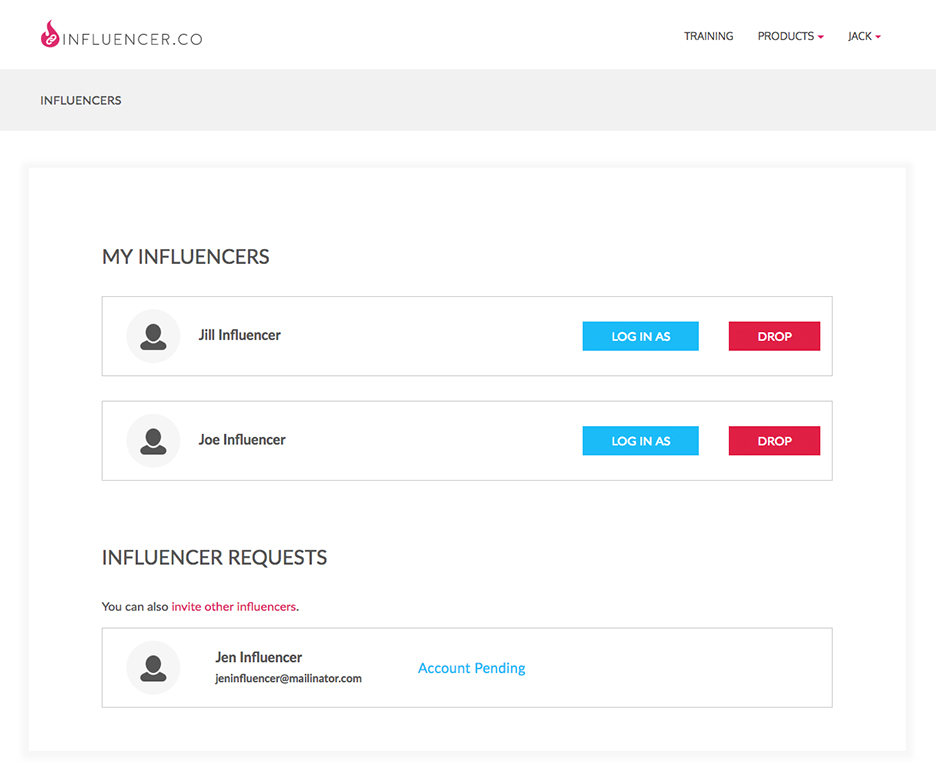 2) Clicking the blue Log In As button to the right of an Influencer’s name will log you into their account.
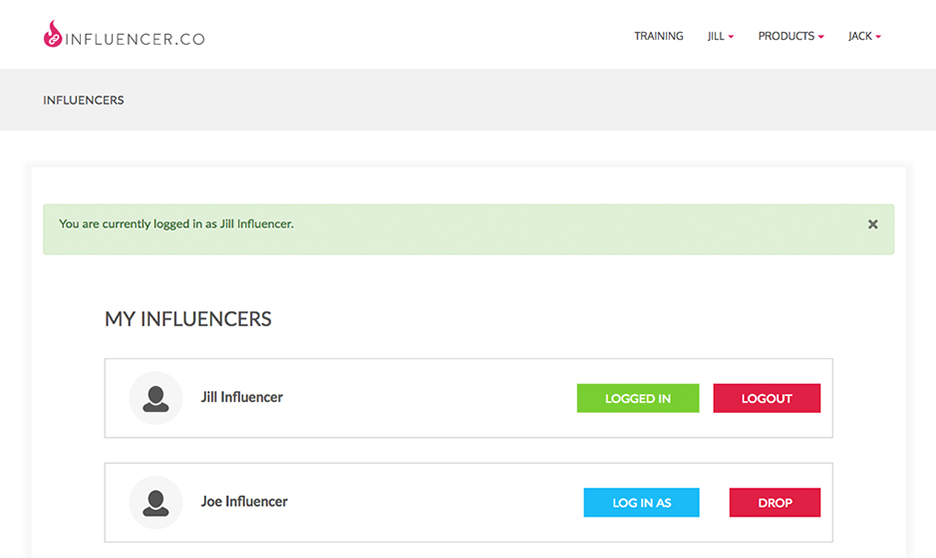
 4b) Clicking on each link takes you to that particular Product’s Details Page.
 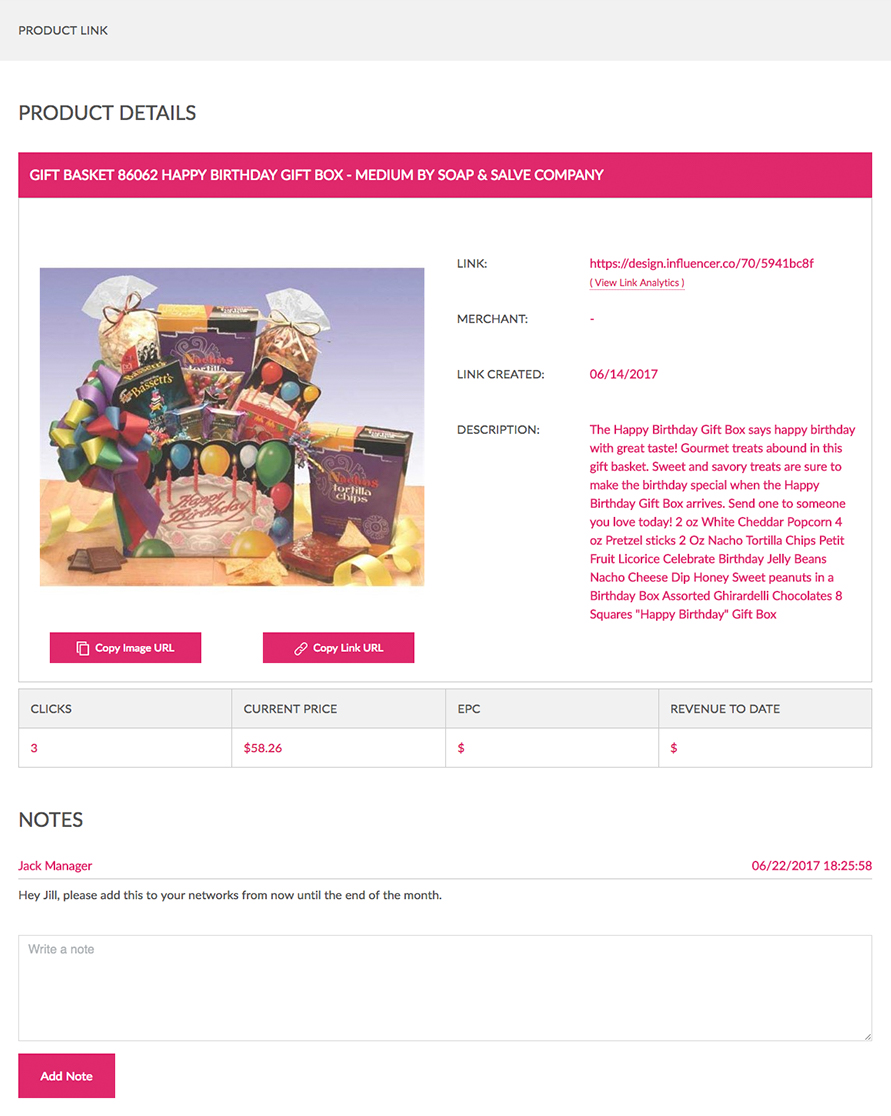 4c) As you create Links for more and more items, you may want to Filter to see things differently
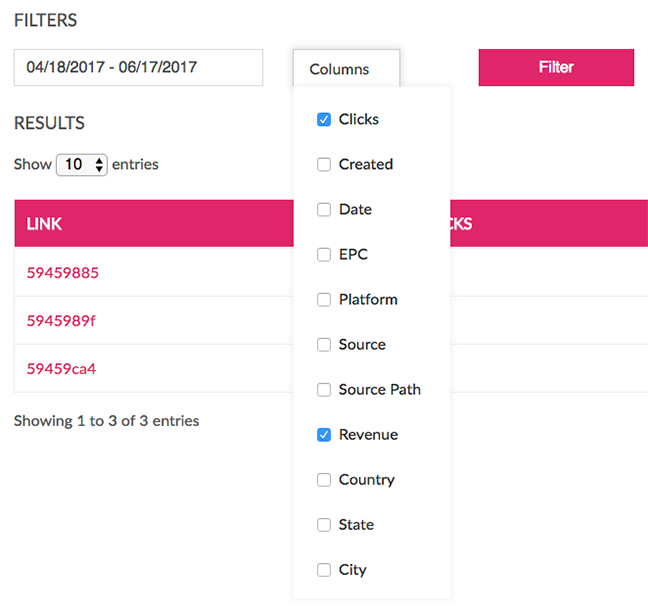
 4d) ...or click the Columns dropdown to change the information that’s displayed:
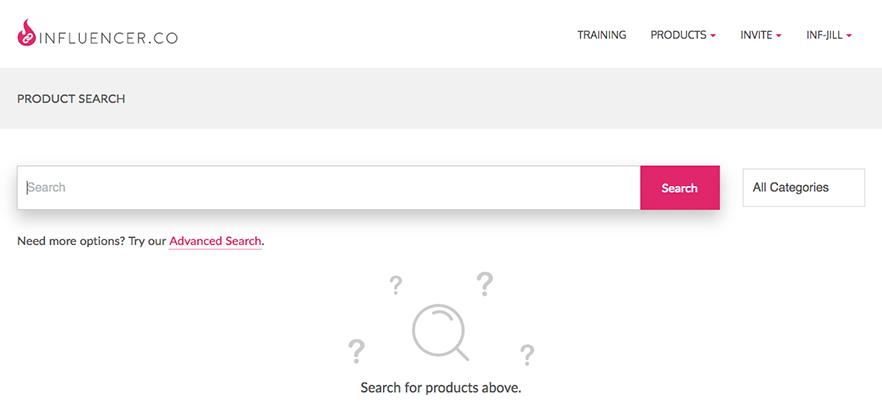
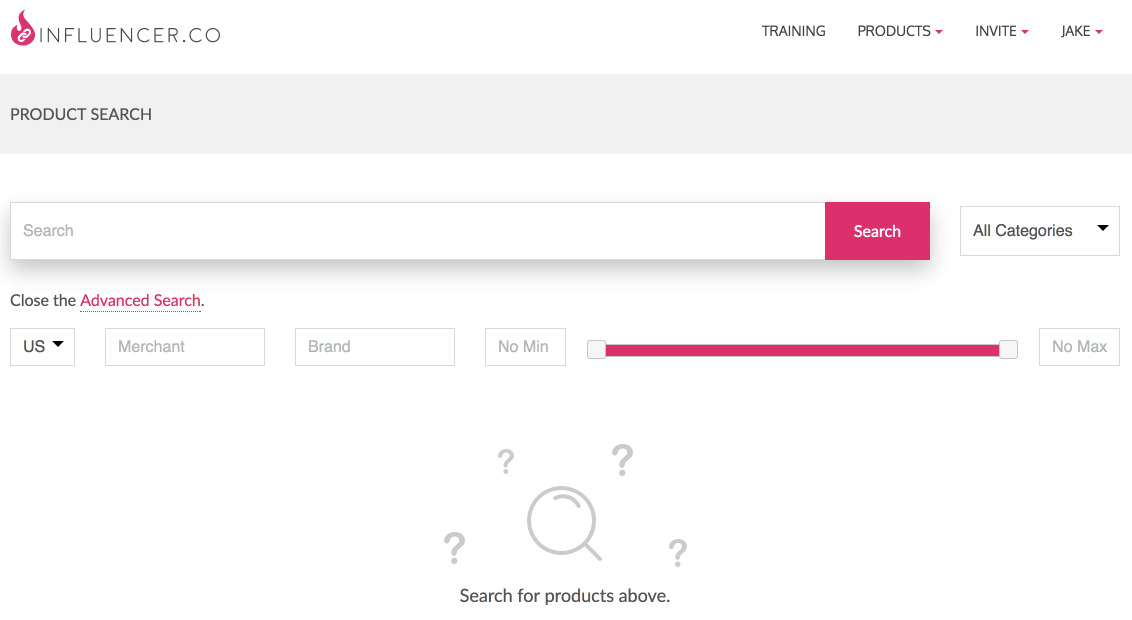
 1b) You’ll be taken to the Search Page.
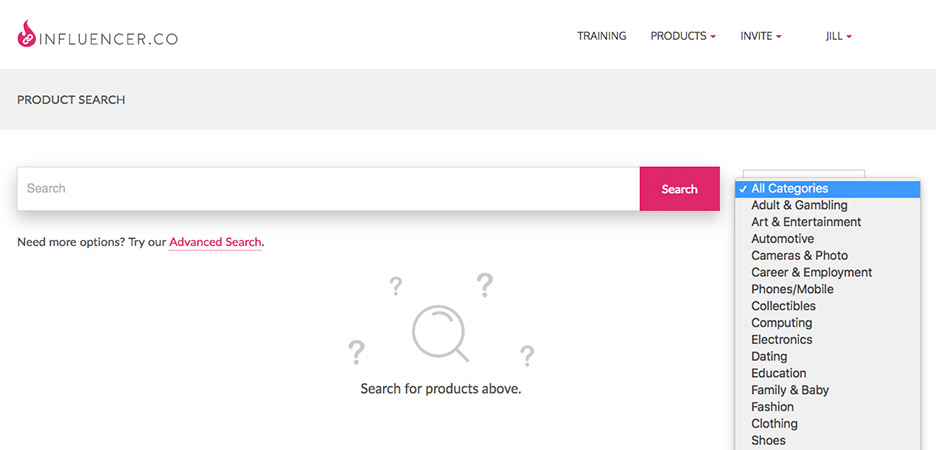
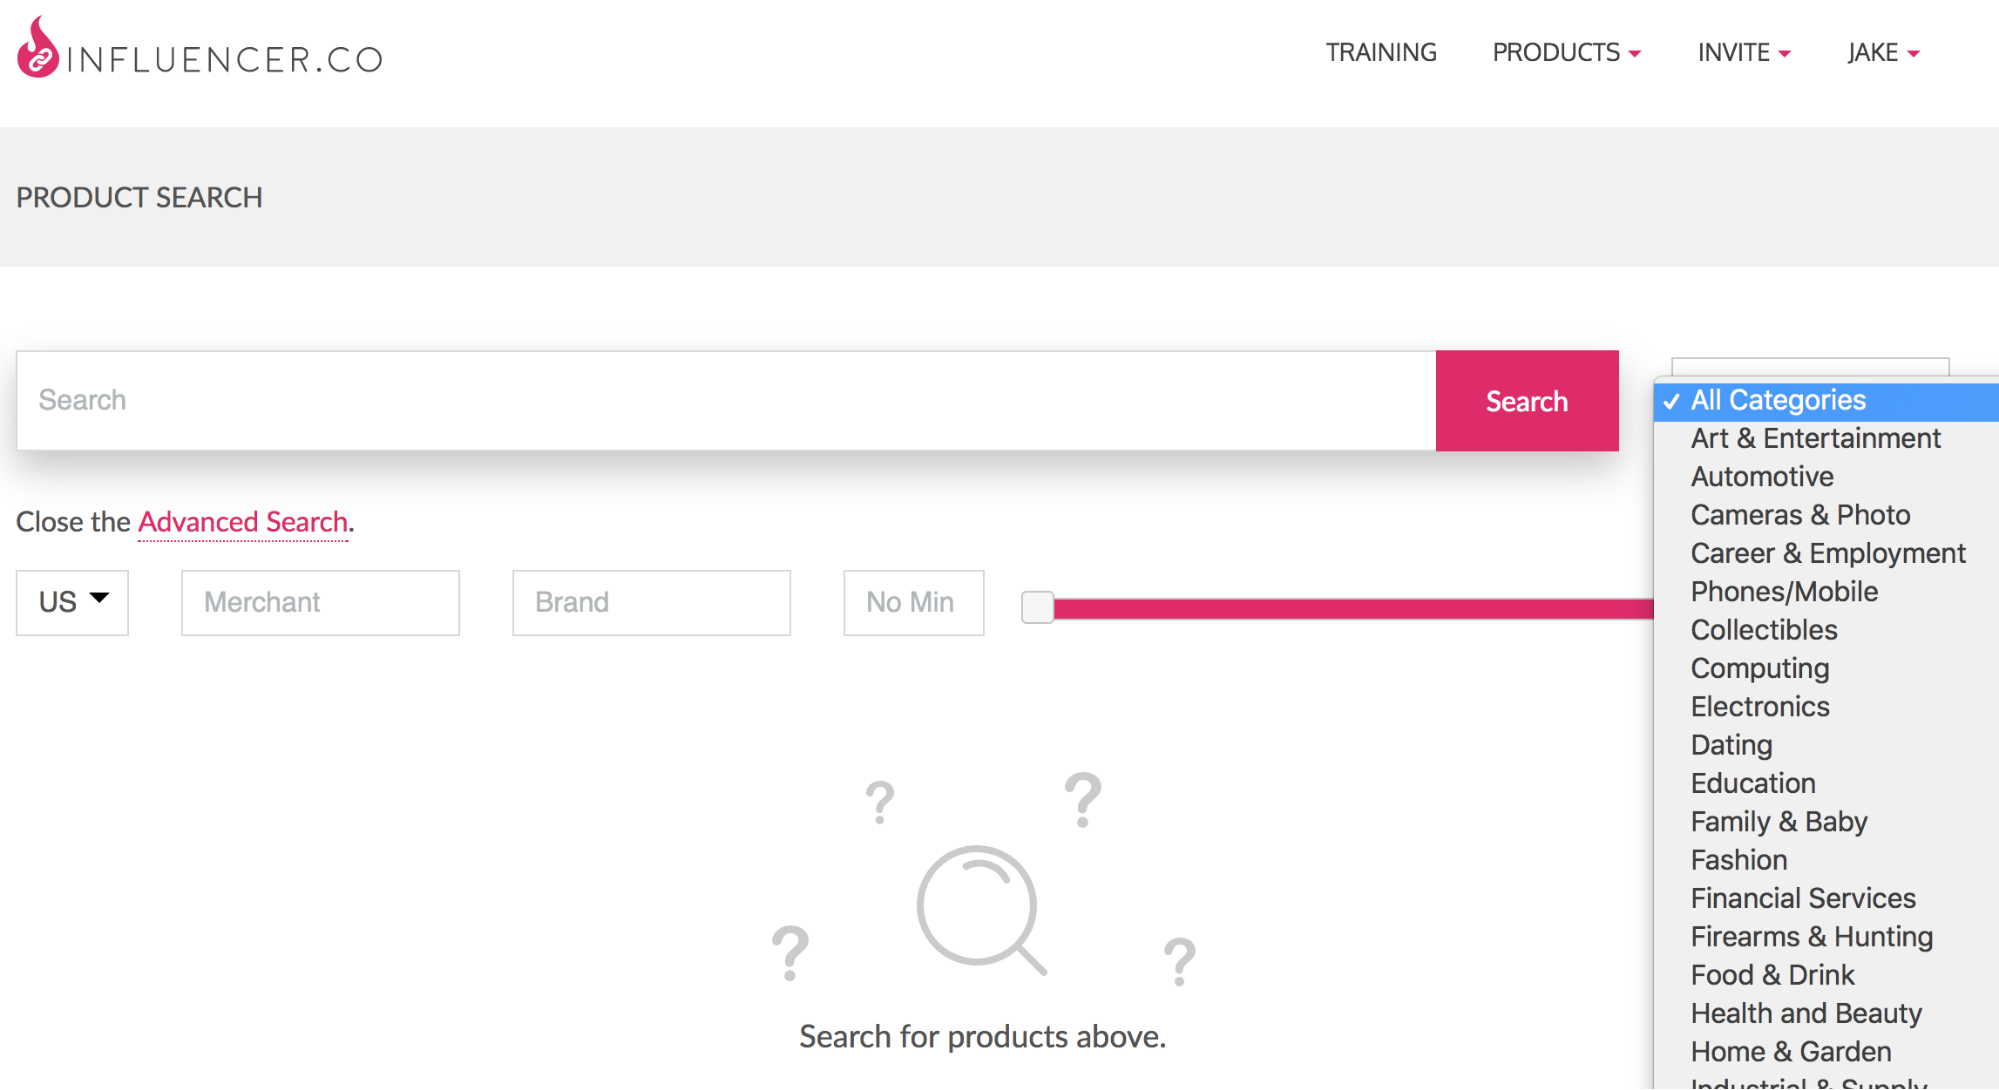
 2a) From there, you can click the All Categories dropdown to the right of the pink Search button to Browse by Category.
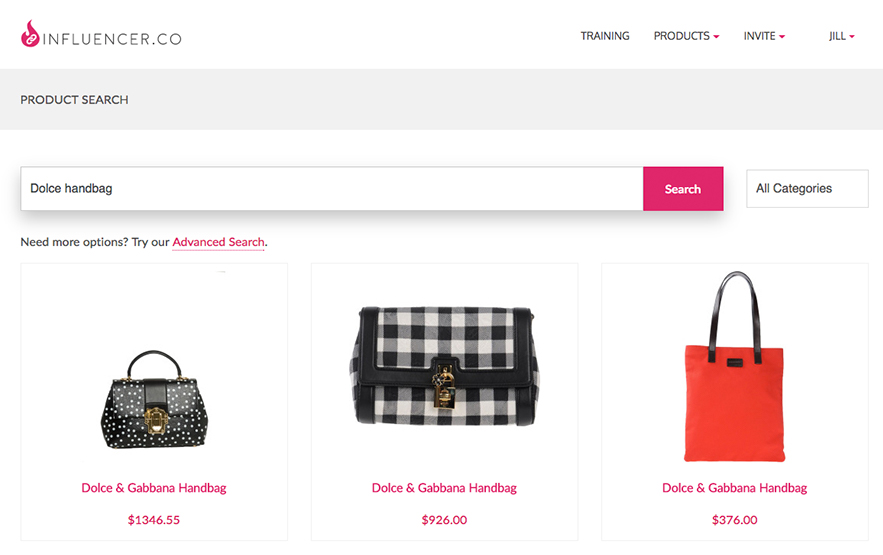
 2b) ...or type a product into the Search field for a General Search.
 2c) ...or click Advanced Search for more options
 3a) Clicking on any Product brings up its Create Product Link Modal.
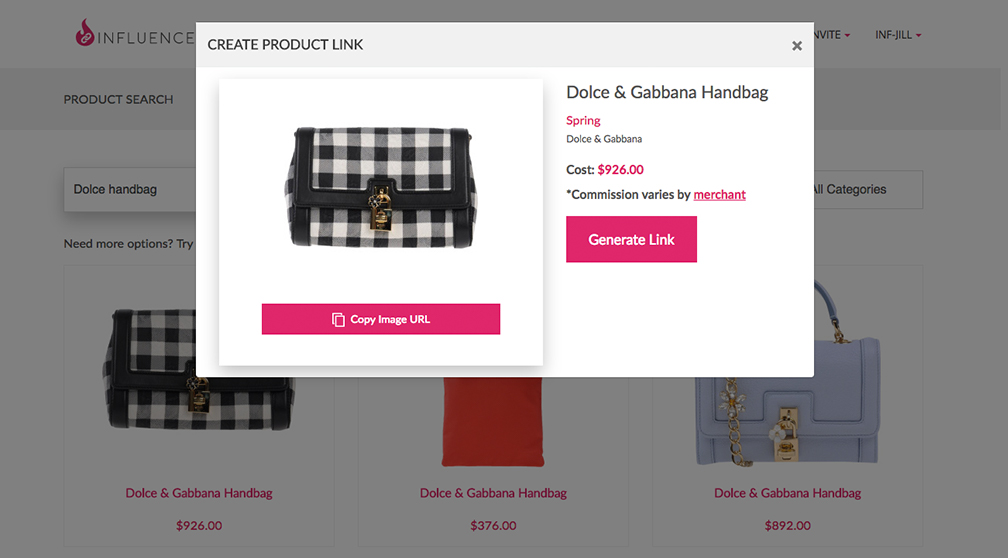
 3b) Clicking on the Generate Link button will create a Custom Short Tracking Link for this Product that is specific to YOUR account, and automatically save it for you. You can get to it later by going to PRODUCTS > Links in the Top Navigation…
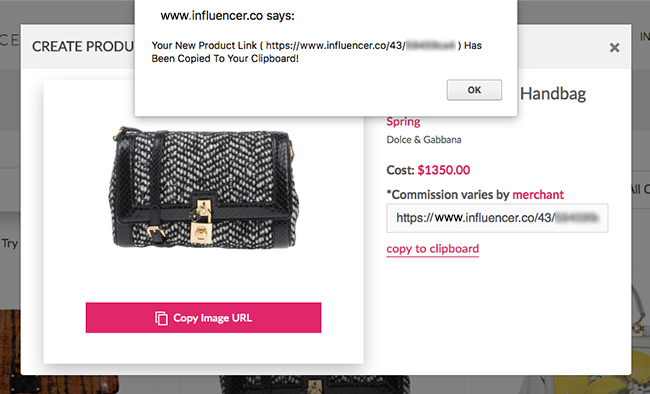
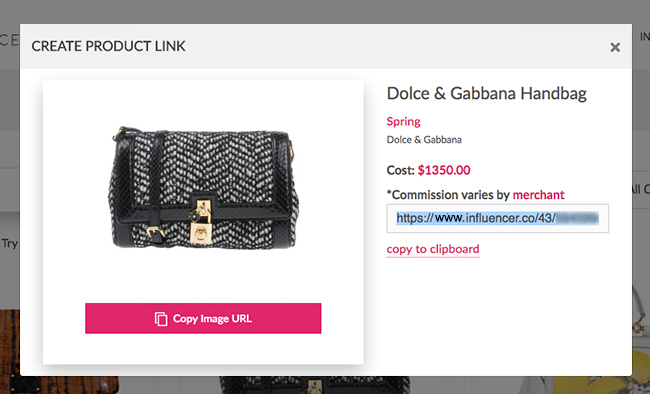 3c) ...or click the Copy to Clipboard link now before you even close the Modal if you’re ready to use it now. The following popup will appear, letting you know it’s ready for Pasting (Command-V on a Mac, Control-V on a PC) into your next social post:
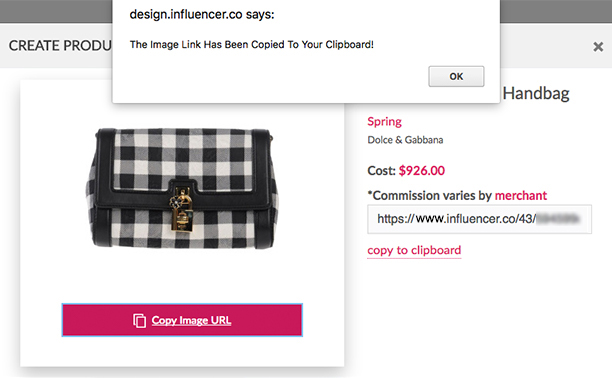
 3d) You can also click Copy Image URL to grab the graphic for posting.
 4a) As stated earlier, you can get back to your links anytime (even if you’ve logged out and back in) by going to PRODUCTS > YOUR LINKS & REPORTS in the Top Navigation…
 That’s all there is to it!
 1b) Then click SEARCH PRODUCTS TO LINK and you’ll be taken to the Product Search Page.
 2a) From there, you can click the All Categories dropdown to the right of the magenta Search button to Browse by Category.
 2b) ... or type a product into the Search field for a General Search.
 2c) ... or use Advanced Search for more options
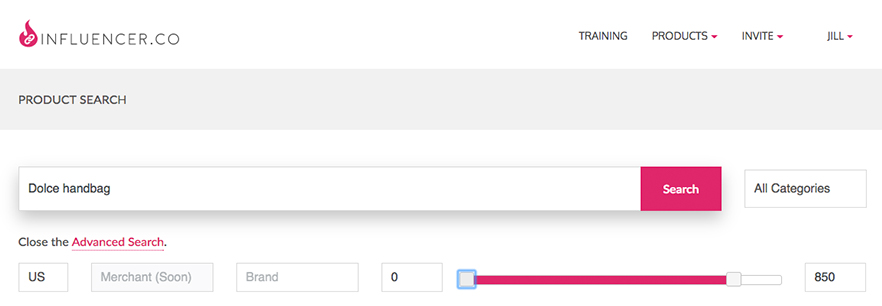 3a) Clicking on any Product brings up its Create Product Link Modal.
 3b) Clicking on the Generate Link button will create a Custom Short Tracking Link for this Product that is specific to YOUR account, and automatically save it for you. You can get to it later by going to PRODUCTS > YOUR LINKS & REPORTS in the Top Navigation…
 3c) ... or click the Copy to Clipboard link now before you even close the Modal if you’re ready to use it now. The following popup will appear, letting you know it’s ready for Pasting (Command-V on a Mac, Control-V on a PC) into your next social post:
 3d) You can also click Copy Image URL to grab the graphic for posting.
 4b) You’ll be taken to the Product URL Search Feature, where you can input the URL for the page where you found the product:
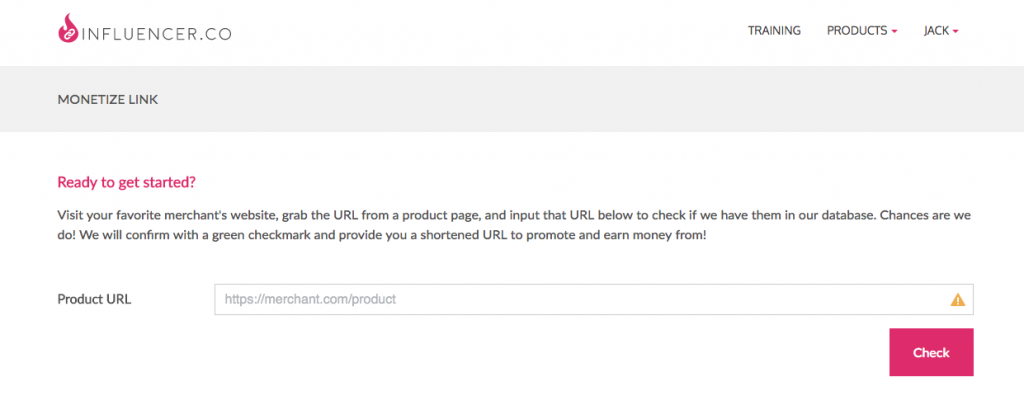 4c) We’ll search our database and tell you if we carry that specific product. If we do have the product, you’ll get a result like this:
 If we don’t have it in our product database, you’ll get a notification like this:
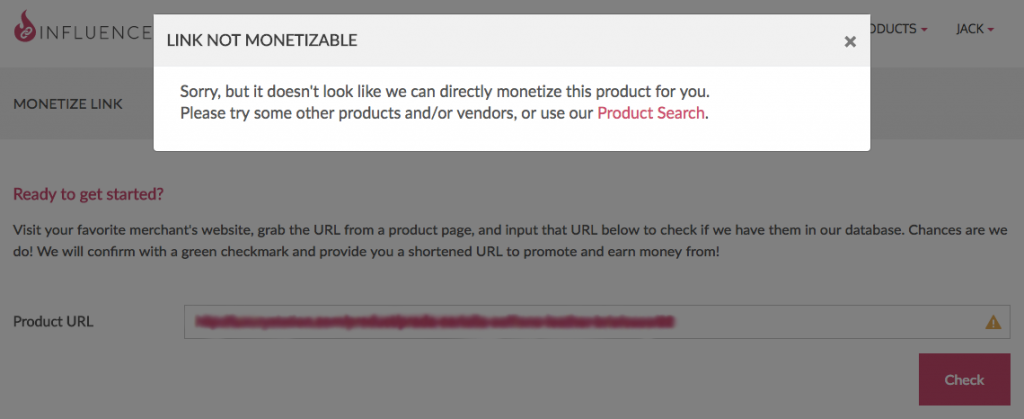 Don’t worry if you get a Link Not Monetizable notification, we’ve got thousands and thousands of other products to choose from, so you’re sure to find something that just right for you and your followers.
4d) From here, you can click on Generate Link to create a link for sharing with your followers (**If you’re logged in as a Manager, you need to log yourself into the Influencer account you will be sharing the product on):
Don’t worry if you get a Link Not Monetizable notification, we’ve got thousands and thousands of other products to choose from, so you’re sure to find something that just right for you and your followers.
4d) From here, you can click on Generate Link to create a link for sharing with your followers (**If you’re logged in as a Manager, you need to log yourself into the Influencer account you will be sharing the product on):
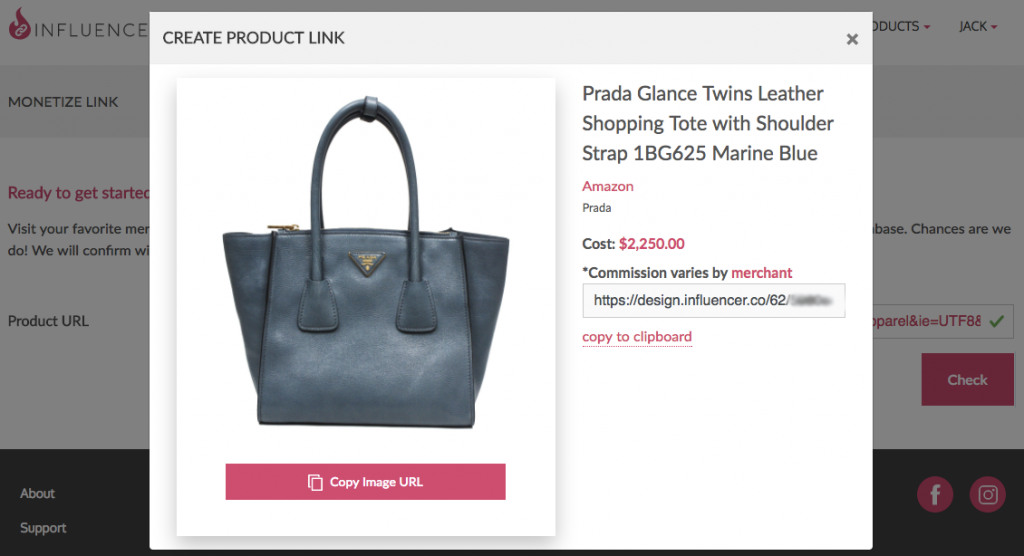 4e) From here, you can copy the link to your clipboard (as shown in step 3d), or copy it directly for use on your social channels. You can also copy the image to share. It’s that easy!
Watch the Product Search and Monetize Link screencast for more detailed information.
Finished: Part IV – Linking and Reporting
On to: Part V –
4e) From here, you can copy the link to your clipboard (as shown in step 3d), or copy it directly for use on your social channels. You can also copy the image to share. It’s that easy!
Watch the Product Search and Monetize Link screencast for more detailed information.
Finished: Part IV – Linking and Reporting
On to: Part V – 
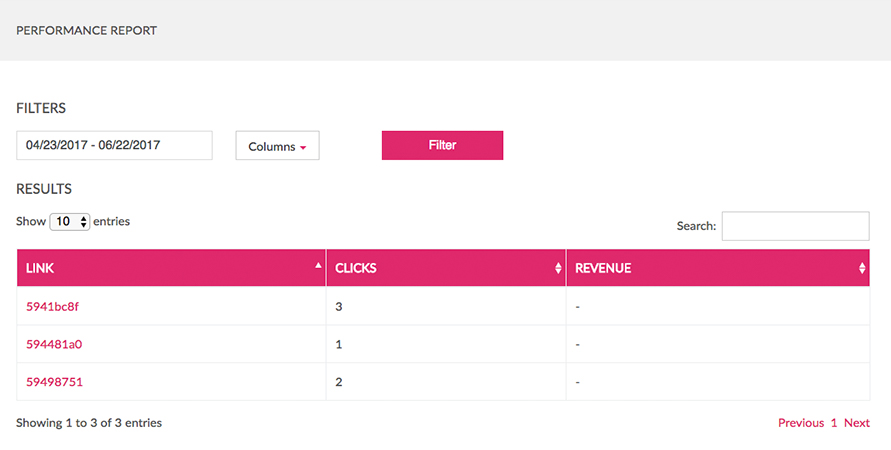
 1b) Which will take you to your Performance Report, showing each of your Links.
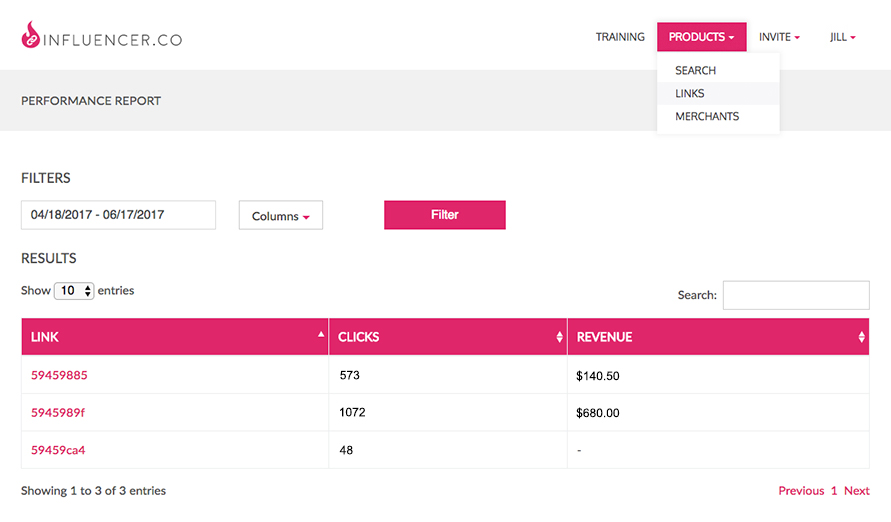 1c) As you create Links for more and more items, you may want to Filter to see things differently
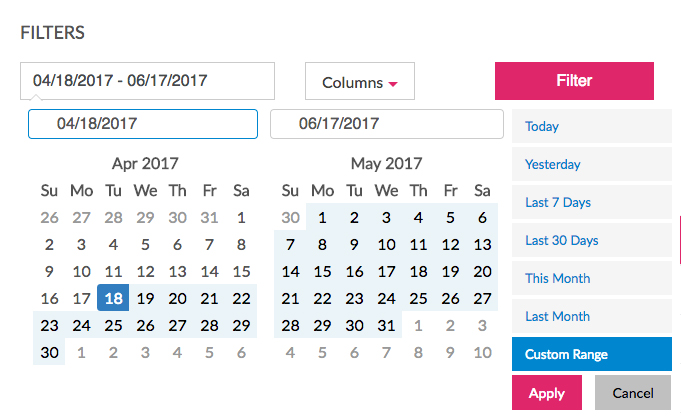 1e) ... or click the Columns dropdown to change the information that’s displayed:
 Watch this informative Link Performance Report screencast for more information on Link Reporting.
It's that easy to create and view reports! Go ahead and give it a try for yourself and you'll see how simple it is to track and report your Influencer.co earnings.
Finished: Part V – Creating and Viewing Reports
On to: Part VI –
Watch this informative Link Performance Report screencast for more information on Link Reporting.
It's that easy to create and view reports! Go ahead and give it a try for yourself and you'll see how simple it is to track and report your Influencer.co earnings.
Finished: Part V – Creating and Viewing Reports
On to: Part VI – 
 1a) Once you're logged in, you'll be taken to the Products page, where you can access the Merchant Search feature. You can click on a Product to pull up the Product Info Screen, where you can click on the Merchant's name or access it through Monetize Link tool.
 1b) You can also find it under the main navigation menu under the Products dropdown.
 1c) Now that you've accessed the Merchant Search feature, you can use the Search Box or the Categories menu to find your preferred Merchants. This is the simplest way to use the Merchant Search tool.
 2a) You can also Search by CPA vs. CPC. CPA (Commission Per Acquisition) means the Commission is paid when the Product is purchased. CPC (Commission Per Click) means the Commission is paid when people click your link and navigate to the Merchant's page. Not all Merhcnat's support both CPA and CPC, so always confirm prior to creating and sharing any links.
 2b) You can filter your Search based on the Rate Type as well. This will confirm you're being paid accurately and according to your currency preferences.
 2c) Use the Commission Type Slider Feature to set the Minimum or Maximum amount of Commission offered.
 3a) If you don't see the product you're looking for, you can click the View More button at the bottom of your Search results to load more Products.
 That's it! Using the Merchant Search tool makes finding the best Products simple.
Watch the Merchant Search screencast for more detailed information on searching by Merchant and other categories.
This is the last in the series of Tutorials. We will continually update these Tutorials as we introduce new features. You can access them at any time by clicking on Tutorials in the Training section of the main menu. Or you can
That's it! Using the Merchant Search tool makes finding the best Products simple.
Watch the Merchant Search screencast for more detailed information on searching by Merchant and other categories.
This is the last in the series of Tutorials. We will continually update these Tutorials as we introduce new features. You can access them at any time by clicking on Tutorials in the Training section of the main menu. Or you can